It is pretty standard that as a project grows, so does the complexity of its build. Too many different technologies, third-party components, libraries, lints, server-side rendering, and project-specific nuances — as a result of all this, the configuration of a build may involve more than a thousand strings.

How to simplify your project build
Compared to ordinary code, reaching such volumes within one module/class/component/entity signals decomposing and dividing the responsibility between more minor and more independent components.
But when it comes to the configuration of a build, such decomposition is relatively rare. In larger projects, you’ll often find colossal webpack.config.js, the modification of which can cause a lot of problems and produce bugs.
If you want to make working on a build easier and more reliable during modifications, please read on. At the start, we have a huge configuration file, webpack.config.js, which describes the entire build. Like this one:
This file is a primary type, made for better understanding. It can be a bit smaller under certain conditions, but it is likely to be significantly larger, depending on the project’s complexity.
First, create a webpack directory and an index.js file in it. Next, move all the contents of webpack.config.js to this file. Leave only the connection of this new file in webpack.config.js itself:

This is to keep the entire configuration within the webpack directory so that all subsequent requirements do not duplicate the webpack directory in the path.
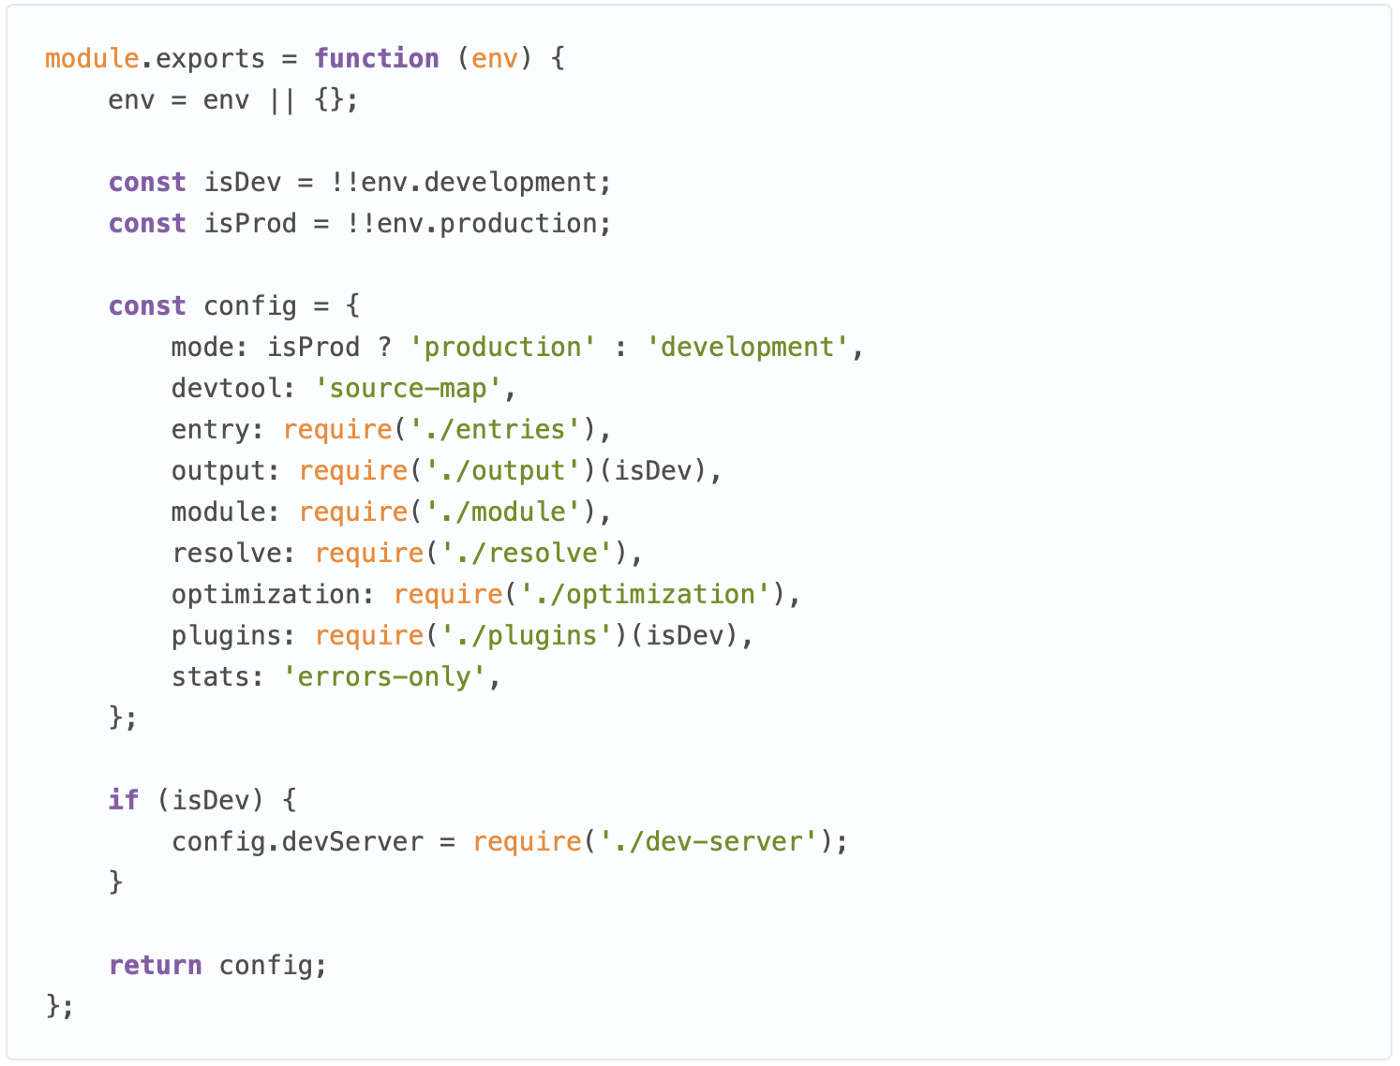
Next, let’s agree that, for each top-level element of the configuration object, we will create a directory and an* index.js* file where, in each case, we describe the corresponding part of the configuration. For example, enter/index.js:

If we need additional parameters (e.g. isDev), we wrap the module in a function that accepts the parameters we need. For example, output/index.js:

We simply build them together in the main webpack/index.js file:

Within each of these subdirectories, you can continue to decompose to the point that is most convenient for you (without making it absurd and decomposing everything into atoms, of course).
For example, webpack/module/index.js might look like this:

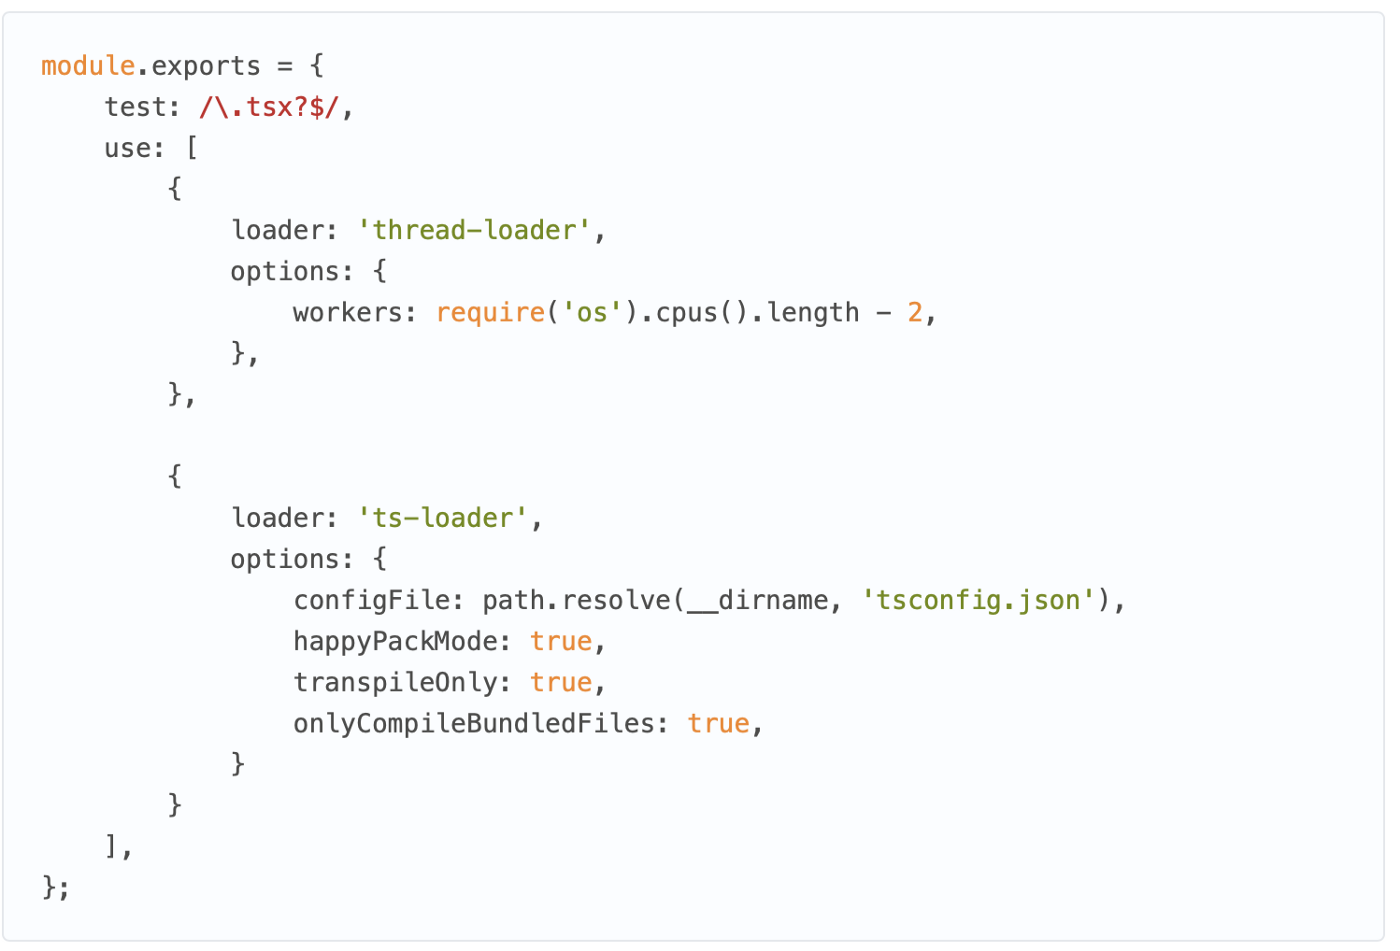
In our example, webpack/module/loaders/typescriptLoader.js would be like this:

Also, don’t forget that if necessary, you can always wrap any of the configuration submodules in a function and pass the required options there.
Now, all that’s left is to connect it to webpack.config.js:

Besides, the approach of putting the configurations for each loader, plugin, alias, and so on into separate modules enables you to make custom builds without unnecessary duplication if your tasks require this.
For example, one of the common cases is a separate build for server-side rendering. For this, two different builds can be described, each with its specifics but generally looking like webpack/index.js. For example, webpack/client.js and webpack/server.js for the client and server build, respectively.
In turn, webpack/index.js assumes the role of the “assembler” for these builds: it decides which build (or all at once) should be run at any given time depending on certain features.
For example, it can do this based on the parameters passed to the start command:

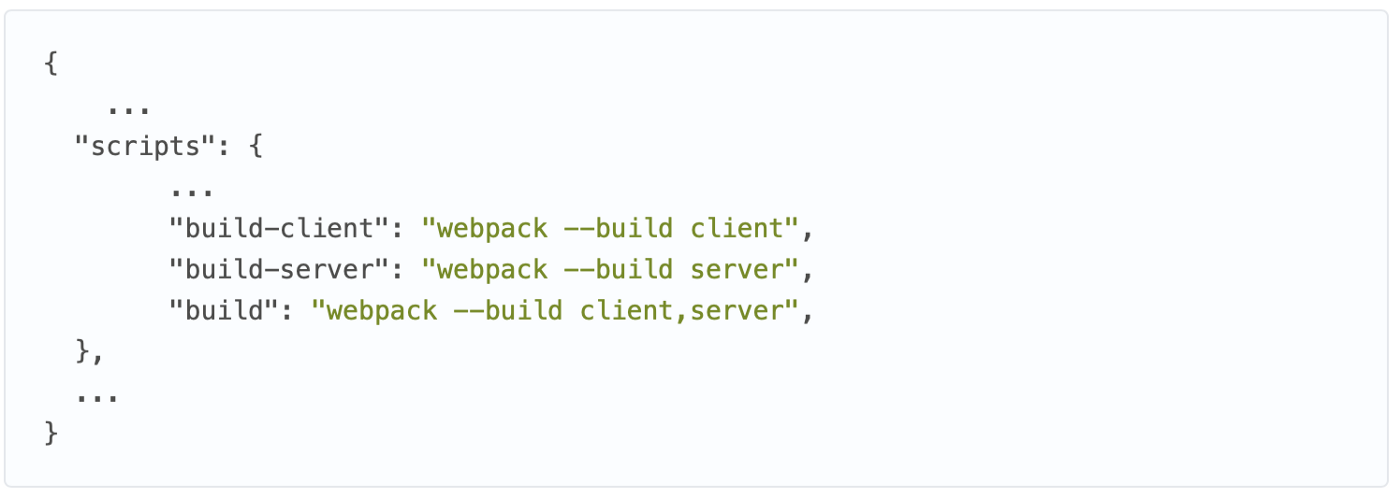
For different build options, you can add separate commands to the ‘scripts’ section of package.json:

If a team is developing multiple projects simultaneously with roughly the same stack and build, you can put the webpack configuration in a separate npm package. You can store it both in the public npm registry and in the internal registry if you do not want to make the configuration of your build public.
This has some nice advantages:
-
Getting rid of duplicate configurations in different projects. All changes will apply to all projects at once when fixing bugs, optimizing the build, etc. There is no need to do it manually.
-
Build-related dependencies are updated centrally and apply to all projects at once.
-
The dependencies will be hidden behind our ‘npm’ module, which will enable you to visually make the package.json of the final projects lighter.
All that is required to connect the build to the final project is to install the configuration package:

And connect it to webpack.config.js:

In case your projects still contain minor differences in their builds, they can be resolved by using the options in webpack.config.js:

By pre-exporting the getConfig function from the configuration module and processing the options.
You can also make local changes to the build by extending the configuration object:

Or you can combine passing the options and extending the configuration object:

Conclusion
We have reviewed an approach in which a monolithic webpack configuration is divided into smaller components, and several custom configurations are combined from them if necessary. In addition, when needed, the design may be hosted in a separate npm module and used for different projects.
Of course, one should remember this is just a set of possible options for solving one specific issue. It’s not the ultimate guide to compiling a webpack configuration. These recommendations can be used fully or partially, but you need to understand the problem of the webpack configuration overload. Therefore, this approach can lead only to complications for a standard home project.