
If you want to build an efficient UI auto-testing process for your project, it’s essential to first consider how testable your application is generally, as well as how you can write effective UI tests.
If you’re using XCTest to test iOS UI, you should first add accessibility IDs to the UI elements on the app screens. Implementing this will ensure your tests are more stable, reliable, readable, and ultimately easier to write. Another valuable approach to explore is adding backdoors to your app under test, which we will explore in further detail below.
Backdoors
Backdoors are extra pieces of code in your app that are required for auto-testing but are hidden from the user. Some examples of backdoors include:
- API URL changes
- Mandatory authorization bypassing
- Feature toggles on/off, AB tests
- Skipping tutorials, onboarding, and bonus screens
- Retrieving information concerning the state of specific internal components
The main goal of backdoors is to enable you to pre-configure the app for testing and also keep track of its state.
What’s in it for us?
1. Atomicity
An effective test is an atomic one that focuses on a single app feature and tells you whether it works properly or not. Tests become more atomic and independent of other app features when they can launch an app in a preconfigured state.
Consider this as an illustration: only authorized users can comment on memes shared on iFunny.
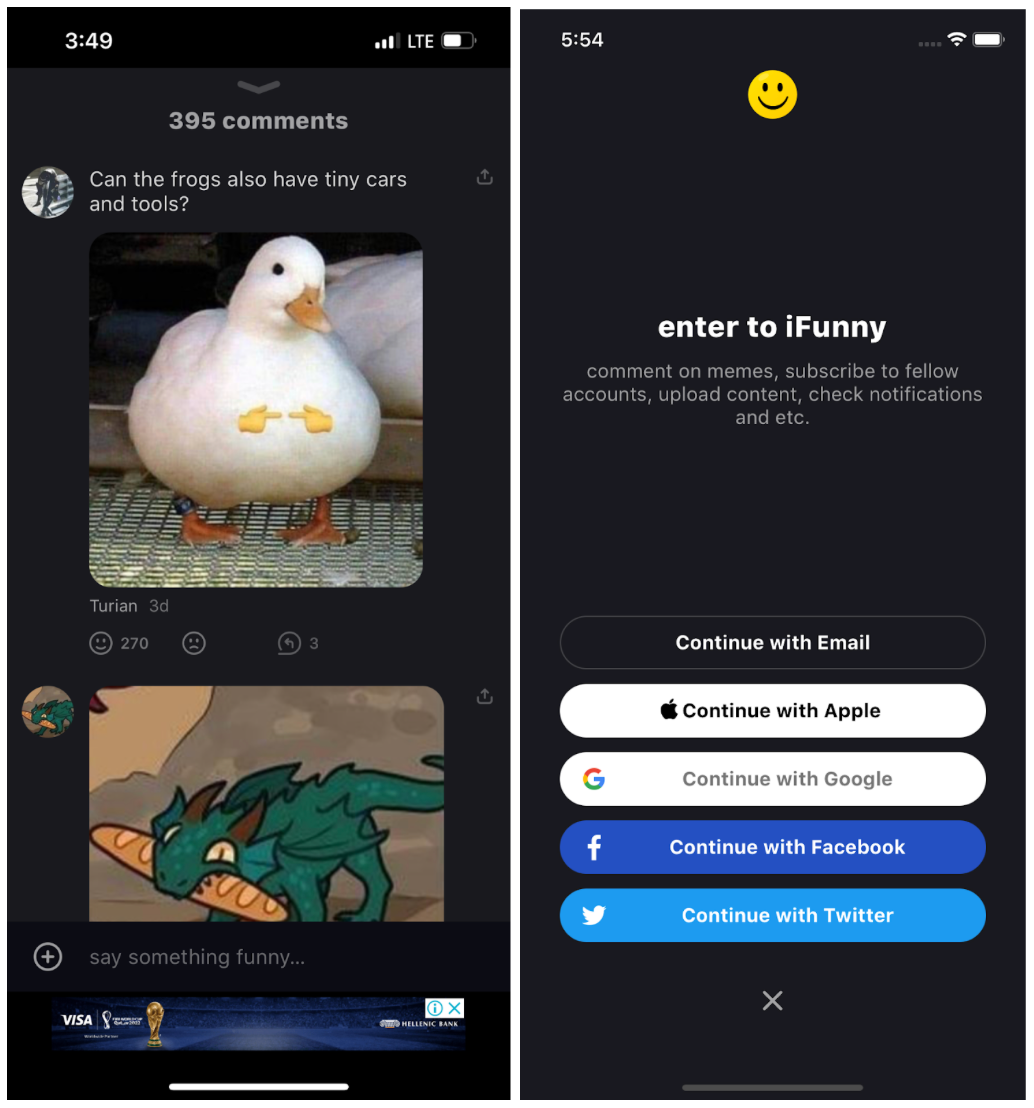
Authorization in comments
The following user cases necessitate UI tests:
- Posting comments
- Deleting comments
- Editing comments
- Liking/disliking comments
Each of these cases require in-app authorization.
There are two ways to approach this:
- Pass authorization in each test — in this approach you will not be able to control the state of the app.
- Preconfigure the app and run it with authorization already in place.
With the first method, the test loses atomicity, which is clearly a drawback. This is due to the fact that testing comments this way indirectly tests authorization as well, and if there is a bug during authorization, we won’t know whether or not our comments are functional.
The tests in the second scenario will only target comments and won’t be dependent on authorization if you run the app pre-configured.
2. Test run time
We can avoid needless UI interactions by running a pre-configured app in the desired state, which can significantly shorten the time it takes to run the test.
- There are also time-sensitive cases. Going back to the comments on memes on iFunny, we retrieve information on how many new comments have been made every 30 seconds and display the answer in a balloon in the header, such as “+2.”
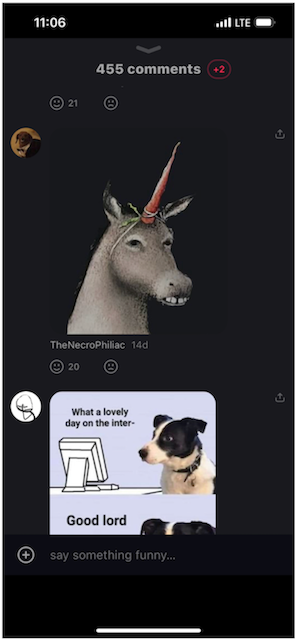
Comments screen
Waiting 30 seconds for each test to run is really time-consuming, but since we can preconfigure the app for testing, we can change this timing to ensure it is appropriate for the test at hand.
- Short and concise tests will run more quickly when in parallel, since the slowest test will always determine how long it takes for the entire scope of tests to run.
3. Stability
First off, UI tests are by definition the most vulnerable because they have so many potential failure points, including hardware, OS, environment, internet connection, etc. As a result, the test is more likely to be flaky the longer it goes on. Thus, by running an app in a pre-configured state, we reduce UI interaction and, as a result, test flakiness.
Second, by controlling the app’s state, we get a more deterministic testing system by eliminating random behavior.
The following illustration explains it well.
In iFunny, we first request permission to access the user’s geolocation.
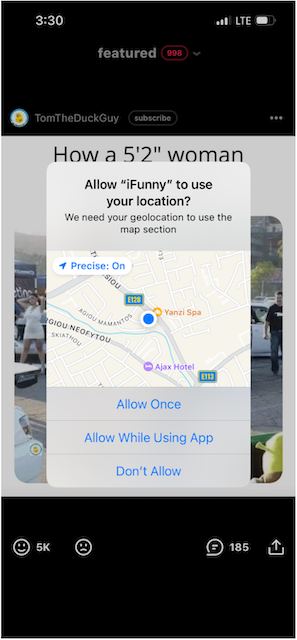
Geolocation request alert
This request’s logic is convoluted and depends on a number of variables, so let’s simplify it to “display on the app’s fifth start.”
Hundreds of tests are run concurrently on simulators and devices with no guarantee of their order. Which test will this alert show up in? There’s no way to tell. The system loses its determinism, and each alert appearance risks the chance of a random failure.
We can run the app in different states by taking control of them:
- Alert has already been shown
- Alert will show up at the next start
- Alert will show up at the current start
We eliminate randomness in tests by controlling the state, which increases stability.
4. There are also more coverage opportunities
The app has certain states that are incredibly challenging, time-consuming, or impossible to trigger through the UI, for instance: iFunny displays a certain screen when the user hasn’t yet responded to requests concerning access to notifications. If the user has already responded either to grant or deny access, the screen is not displayed.
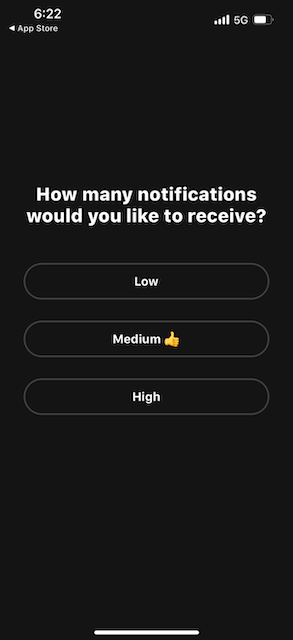
Screen with the notification number selection
We can cover all cases with push notification permissions by managing their status from tests:
- If a user has granted access to notifications: the screen will not appear
- If a user has denied access to notifications: the screen will not appear
- If a user has never responded to notification access requests: the screen will appear
Let’s control everything!
Let’s get down to basics, and cover the tools you can use to manage an app’s state and ensure it is test-ready.
1. launchArguments and launchEnvironment
The native method from XCUITest is the simplest way to pre-configure the app under test. Use the launchArguments and launchEnvironment properties of the XCUIApplication instance.
Launch Arguments can be passed from the tests to the app under test at startup. For example:
let app = XCUIApplication()
app.launchArguments.append("skip-tutorial")
app.launch()
Unlike in launchArguments, in launchEnvironment you can pass a dictionary with certain data, such as an authorization token:
let app = XCUIApplication()
app.launchEnvironment[“auth_token”] = “Basic XXXX”
app.launch()
These parameters can then be quickly retrieved and used in the app’s target:
#if DEBUG
let needSkipTutorial = ProcessInfo.processInfo.arguments.contains(“skip-tutorial”)

if(needSkipTutorial) {
   //write code to skip it
}

if let accessToken = ProcessInfo.processInfo.environment[“access_token”] {
//write code to setup authorization
}
#endif
However, take care to ensure that this code does not obstruct the app’s production environment. Here’s a link to one example of the launchEnvironment processing code structure.
This approach will be sufficient for the majority of common tasks, like skipping tutorials or bonus screens or bypassing authorization. What if, however, we wanted more power, for instance to alter the app’s state after launch? Or to retrieve information on its state while the test is still running? This would be challenging to accomplish with launchArguments and launchEnvironment. This can be done, however, by means of another tool.
2. SBTUITestTunnel
Despite all of its benefits, XCUITest has some drawbacks. For starters, it is a black box testing tool, which means that we are unable to look inside the app because black box testing conceals information about its internal state.
There are two independent processes: app under tests and test app; the only way to make them interact is through the UI.
SBTUITestTunnel work process
This library adds the ability to influence the state of the app being tested without using the UI, expanding the functionality of XCUITest by establishing an http tunnel between two processes. This helps us to get a glimpse inside the app.
In order to use the library, minor changes to the app target are required. You must configure an http server, which will receive commands from the process running the tests. This can be done in the following way application(_:didFinishLaunchingWithOptions:):
#if DEBUG
    import SBTUITestTunnelServer
#endif

  func application(_: UIApplication, didFinishLaunchingWithOptions _:
[UIApplication.LaunchOptionsKey: Any]?) -> Bool {
#if DEBUG
     SBTUITestTunnelServer.takeOff()
#endif
    //…
}
No extra installations are needed for tests; the library adds XCUIApplicationinstance in XCTestCase and the launchTunnel extension in XCUIApplication to start the app with the tunnel:
override func setUp() {
   super.setUp()

app.launchTunnel()
}
It is now possible to interact with the app process as we can describe commands in the app target and start their execution right from the tests!
Consider this illustration:
As the app is running, iFunny gathers analytics about various user actions, technical metrics, and so on. These analytics are collected and sent to the server once per minute. We must then verify that the expected events are triggered by specific actions taken by the user. For instance, when the user tapped on the main menu, it triggered an associated event that was sent to the server within the appropriate parameters. Waiting one minute for them to be sent in each test would be too time-consuming. The ability to command the app to “send all the accumulated events now” would be nice. This is when a tunnel between the app under tests and the test app really comes in handy.
Here’s what it looks like in practice.
In the target with the app, we register the “send all the accumulated events” command:
SBTUITestTunnelServer.registerCustomCommandNamed(“sendCollectedEvents”) { _ in
  AnalyticsController().sendCollectedEvents()
  return nil
}
And we invoke it from the tests:
func testShouldBeSentOpenMenuEvent() {
  app.launchTunnel()
  openMenu()
  app.performCustomCommandNamed(“sendCollectedEvents”, object: nil) //here is an invocation of code block sendCollectedEvents in application process

  shouldBeSentOpenMenuEvent()
}
SBTUITestTunnel can do a lot more than run custom code blocks. They also have a number of very useful networking features, such as the ability to stub, monitor, throttle and rewrite network calls. This document contains more information on each of these features.
However, before we move on to the following tool, I want to draw your attention to another very handy feature: UNUserNotificationCenter and CLLocationManager stubbing.
To illustrate, let’s cover the iFunny functionality with UI tests. We’ll use the question “How many notifications would you like to receive?” that we mentioned previously.
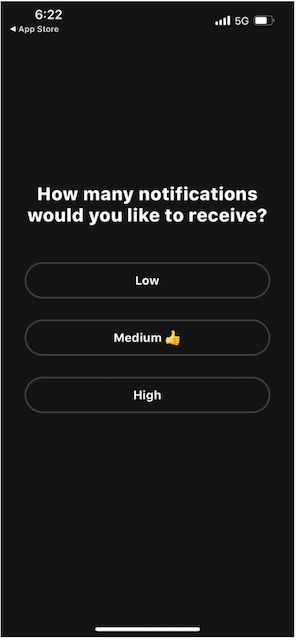
Screen with the notification number selection
func testShouldBeShownHowManyNotificationsScreenWhenStatusIsNotDetermined() {
  app.launchTunnel {
    self.app.notificationCenterStubEnabled(true)
    self.app.notificationCenterStubAuthorizationStatus(.notDetermined)
   }

   shouldBeShownHowManyNotificationsScreen()
}

func testShouldNotBeShownHowManyNotificationsScreenWhenStatusIsDenied() {
  app.launchTunnel {
    self.app.notificationCenterStubEnabled(true)
    self.app.notificationCenterStubAuthorizationStatus(.denied)
  }

   shouldNotBeShownHowManyNotificationsScreen()
}
It’s pretty simple: you enable UNUserNotificationCenter stubbing notificationCenterStubEnabled(true) and control UNAuthorizationStatususing notificationCenterStubAuthorizationStatus.
With the addition of this tool, xcuitest’s drawbacks are partially resolved, and it is now possible to write gray box UI tests with more control over the app under tests.
3. mac host — test app tunnel
SBTUITestTunnelHost work process
This tool is not built into the app under test and does not directly increase the testability of the app being tested, but it significantly broadens your UI testing options, so is worth mentioning.
Consider a situation where an app changes its behavior in accordance with whether it is in light or dark mode, and we need to cover this with UI tests. Another issue might be the need to reset the photo permissions before a particular test.
It’s good to have control over the simulator from tests, specifically access to simctl, to address these issues, and this tool is available for these tasks. We can use it to run shell commands from the test target and create a tunnel between the test app and the mac host. In other words, we can gain control over the simulator from the tests!
Having access to simctl expands the range of options for managing the test code and simulator. Using this mechanism you can do the following:
- Install/uninstall
- Install/uninstall third-party apps
- Grant/revoke system permissions
- Send push notifications (simctl push)
- Set light or dark mode
Run SBTUITunnelHostServer to use it on a Mac host; it will take commands from the tests and execute them.
The host property (SBTUITestTunnelHost instance) will be added to XCTestwhen you import SBTUITestTunnelHost in order to communicate with the server during tests.
What the code looks like:
func testShouldUploadImage() {
  host.executeCommand(“xcrun simctl privacy booted revoke photos \(bundleId)”) //send simctl command to reset photos permissions


  app.launch()
  openUploadScreen()
  tapOnUploadButton()
  allowAccessToPhotos()
  uploadFirstImage()

  imageShouldBeUploaded()
}
Great stuff, but the example above will only run on the first simulator if there are multiple simulators running on the mac host. We expect the command to be sent to the simulator where the test is being run, so this does not work for us.
Let’s retrieve the ID of the simulator where the test is being run. You can get it by parsing the Bundle path from the xctets app; here’s the approximate format:
“/Users/<user>/Library/Developer/CoreSimulator/Devices/<device id>/data/Containers/Bundle/Application/<app id>/UITestsRunner.app”
All you need to do now is extract the device id from this path:
func deviceIdentifier() throws -> String {
  let bundlePathComponents = Bundle.main.bundleURL.pathComponents

  if let devicesIndex = bundlePathComponents.firstIndex(where: { $0 == “Devices” }){
      let deviceIdIndex = devicesIndex + 1
      if deviceIdIndex < bundlePathComponents.count {
         return bundlePathComponents[deviceIdIndex]
      }
   }
   fatalError(“Can’t parse Device id from bundleURL:\(bundlePathComponents)” )
 }
host.executeCommand(“xcrun simctl privacy \(deviceIdentifier()) revoke photos \(bundleId)”)
The photos access reset will now be executed on the exact device on which the test is being run!
The executeCommand method executes the command and only returns the result after the execution. In some cases, such as when recording a video, this might not work because the command will keep running until it is canceled. For this situation, the tunnel has another method called launchCommand that will initiate the command and immediately return its uuid.
Example with video recording:
private var videoRecordCommandId: UUID?

 override func setUp() {
   videoRecordCommandId = host.launchCommand(“xcrun simctl io \(deviceIdentifier())
recordVideo — codec=h264 — force /Users/vladimirfrolov/Desktop/test.mov”)
  }

  override func tearDown() {
    if let uuid = videoRecordCommandId {
        host.interruptCommand(with: uuid)
    }
  }
Every test’s video recording will be saved in the working directory on the Mac host.
This tunnel’s capabilities go beyond just using simctl; they also include the ability to run shell scripts to prepare test data, run idb commands, etc.
Summary
UI testing is always a challenging task, and its success is largely dependent on how testable your app is. Including backdoors can help you to write more atomic, focused, and quick tests and also expands the potential for automated UI testing: feedback from your tests on the app’s state will be more timely and precise. Therefore, product delivery will happen faster!